Constructing a traditional greenhouse and maintaining one is definitely not a past time. The cost and energy you need for them are significant. They aren’t for those who just want to do it for a past time. Although greenhouses need constant maintenance to function properly, it isn’t that hard to build it. You can do it by simply utilizing materials easily available around. By following this DIY guide you can easily build a greenhouse in your backyard without spending too much.
How to build a normal greenhouse
Growing flowers, fruits, vegetables and plants in your own greenhouse is good way to unwind and spend some quality time with nature. If you are fond of greenhouses, you can build one in your backyard or garden easily. If your garden is too small, you can also relocate to a bigger place with these eco-friendly movers. A greenhouse can be attached to your home or be a freestanding one. In a freestanding structure, separate facilities for heat, electricity, and water are required. This hassle is absent in an attached construction. You will need to build only three walls as the fourth side will be enclosed by the house.
Here are some simple instructions to make your own small greenhouse, also known as a coldframe.
Difficulty Level: Moderate: (Requires basic knowledge)
Time required: 48 hours
Approximate Cost: $20-25 per square foot
Resources required:
Plastic or wooden frames, concrete, cushioning sand, galvanized nails, traditional glass, fiberglass, double wall plastic, film plastic
1. Prepare the foundation:

Decide where you would build your greenhouse. Take all required measurements like length of the side walls, water pipes, windows, etc. If you are using plastic or wooden frames, then, cut out frames for the base, roof and walls of the greenhouse. However, if you are using concrete, then, you will need to make a bed of cushioning sand on the base.
2. Fix the frame securely:
Affix frames on the ground using galvanized nails and plates. Now, set up the walls by fastening them with galvanized nails and wooden screws. Make sure that they are fixed to the base securely. Set up all electrical fittings and lay out the pipes. Put the frames for windows in place with nails and adhesives. Then, mount the door securely using hinges, nails and glue.
2. Construct a sheltering roof:

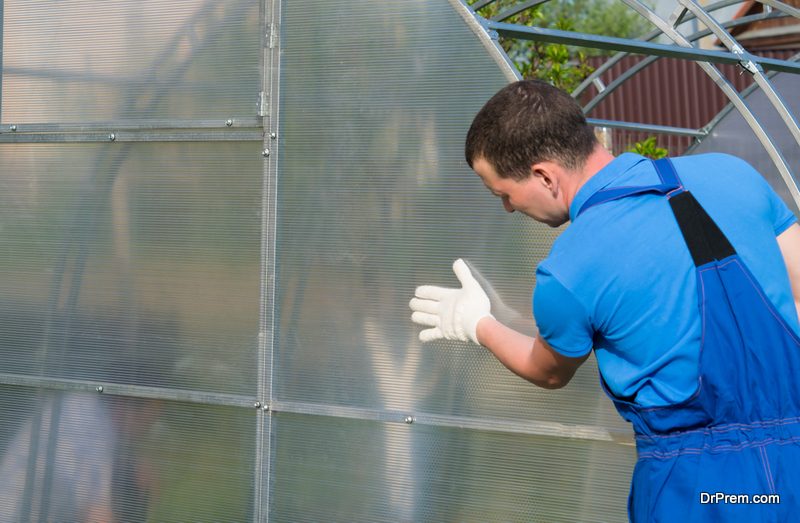
You can use either traditional glass or fiberglass or double wall plastic or film plastic to make the shelter screen of your greenhouse. Although transparent glass gives ample light, it is easily breakable. Film plastic is also great to let the sun light in but it would need to be replaced after a year or so. Fiber glass requires maintenance but is durable. Conserve energy by using double wall plastic that holds on to heat for longer but it will also constrict the amount of sunlight going through the greenhouse. The roof can also be made up of corrugated panels which are extremely sturdy.
To support a glass framework, a sturdy casing of aluminum or iron should be used. With wood, frames of PVC pipes should be used. Finish by making a pathway of stones or pebbles reaching up to the plants and then lay gravel for proper drainage.
How to build greenhouse from recycled materials
Frequently asked questions:
1. Gather Materials
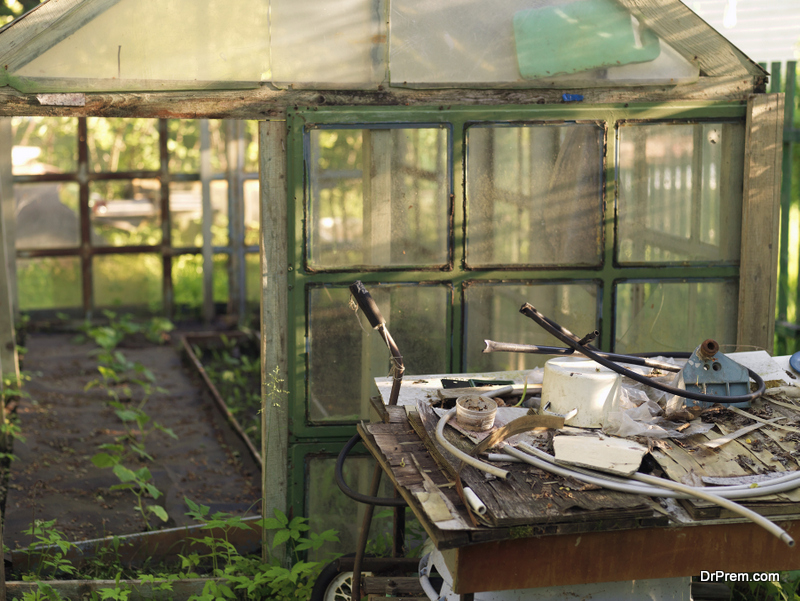 Start with gathering materials like casements, hardware, clump, lattice, cement, etc. that are old but fine. There may be certain houses or office buildings around your locality that are being renovated. These can work as great sources of material for your project. You can also ask your friends or relatives for the same.
2. Make repairs
Once you are ready with all your materials, clean them properly and make necessary repairment. It is quite natural that the old windows and their different parts will be somewhat dirty and have traces of paint on them. Eliminate everything neatly. Also, fix the cracks and fissures, take the frames apart from the windows, and pull the nails out of the clump.
3. Prepare the design
 Now, you have to come up with your desired greenhouse design. While making the layout, take the windows you have collected into account and create a design that would be best for utilizing them. The position of the windows need to be so that a cross breeze is created. It will be wise to keep the design as well as the note of required measurements handy.
If you are a newbie to DIY greenhouse project, you should go for the easiest type of roof i.e. pent shed roof which is slanted from front to back. Find out the roof angle with the help of an ‘angle finder’ instrument. Furthermore, make sure that you have sufficient amount of deck screws for building an impermanent greenhouse.
4. Build the structure
Now, build the structure by joining the walls (2”X4”), headers (2”X4”) and corner posts (4”X4”) together. The construction will not remain upright if you use smaller frames. While attaching the frames with one another, provide support to the walls. Do not install the windows unless and until the walls are placed at the same level. Make sure that your roof panels are corrugated, if winter is the main season in your country.
5. Final Touch
have also gathered lattice for roofing your home and you have to wrap it with a couple of layers of greenhouse plastic for using. The doors of your greenhouse should also be installed at this stage. Finally, give the cement pieces perfect shape to sit in front of your house as stepping stones. Voila, you are done!
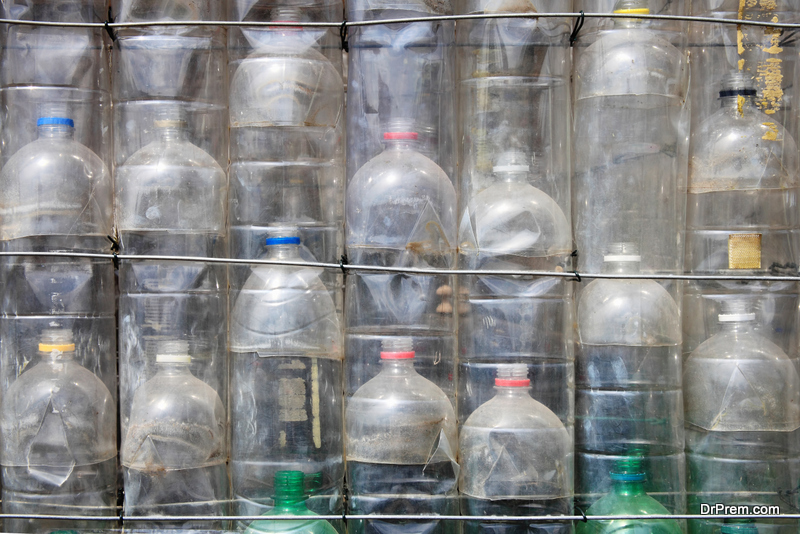
How to build greenhouse from plastic bottles
1. Preparing the bottles
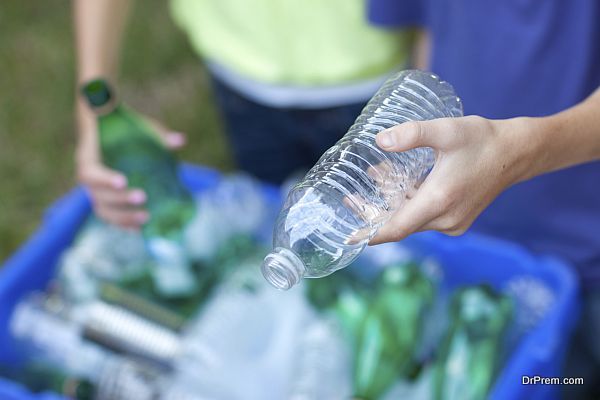 Clean the collected bottles thoroughly to remove the labels and also clean all the dirt. This can be done by using soapy water and some buckets full of clean water. Try to avoid water wastage during this process. With a pair of sharp scissors, remove the top and the bottom of the cleaned bottles. This process has to be performed with caution as the scissors and the cut plastic can be sharp and induce cuts if not handled properly. If you have kids helping you in the project, supervise them during this entire process.
2. Fixing the posts and building the basic frame
Fix four vertical posts for the corners of your greenhouse into the land. You can use 4×4” treated posts and cement them a couple of feet below the ground level. Add slabs or mulch around the inside to avoid growth of weed. These posts will function as the corners of your greenhouse. You can use 2×2” timber to make a basic framework for the project. Create the door and the roof using these timber frames that have mitered corners screwed together.
3. Threading the bottles
Start stacking the bottles one inside another with the bamboo canes supporting them in the middle. Reverse a bottle on one end so that it locks the others. When you are done threading the bottles you will have a long line of bottles one inside the other with the ends of the cane sticking out on either side.
4. Attaching the stacks on the frame
Start placing the stacks of bottles next to each other on the frames that you have made for the walls. The canes that are sticking out of the top and bottom of these stacks will be attached to the top and bottom timber of the frame by using fencing staples.
Staple as many rows as possible to completely fill the frame with rows of bottles. For the roof, you can use two triangular frames made out of timer if you choose to make a sloping frame or a simple frame for a flat roof. Prepare these frames in an identical manner
5. Putting it all together
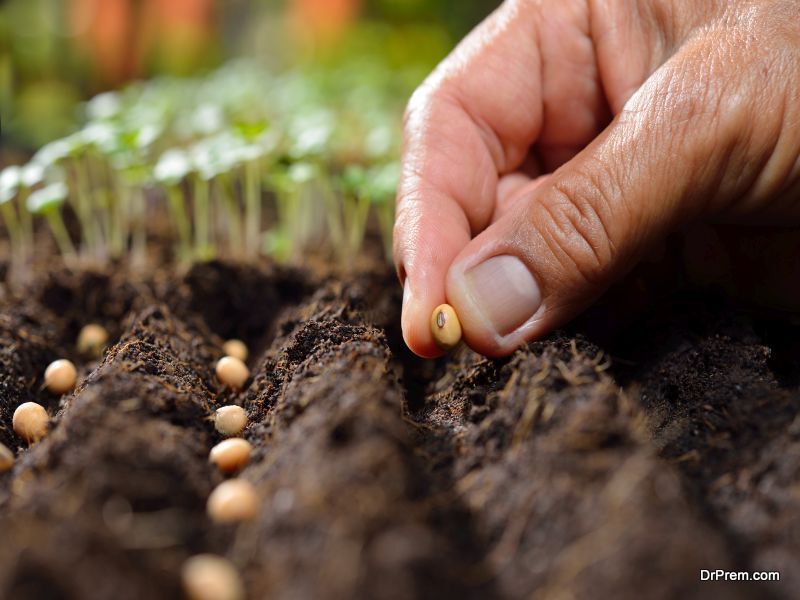
Start screwing the prepared frames to the uprights that you cemented earlier. You can prepare a door in the similar fashion but remember to keep it slightly smaller than the inside of the frame that you have prepared for free opening. Now that you are done, start planting your veggies and flowers in your recycled greenhouse.
A greenhouse in your backyard is an ideal way of saying that you are pro-environment. Building one yourself with the use of recycled plastic bottles can be the biggest motivating statement that you make in the world.
Frequently asked questions:
1. How to decide the best place for building the greenhouse?
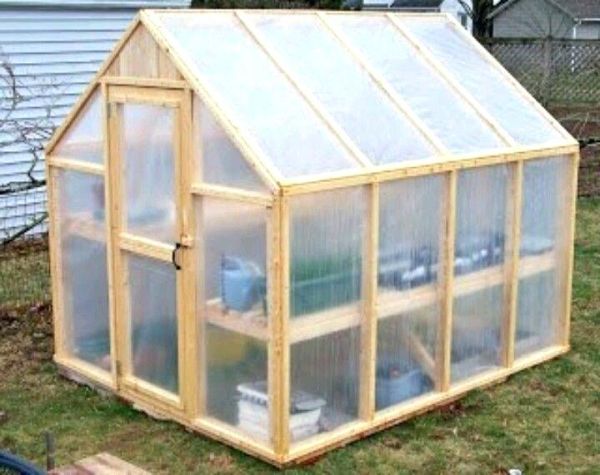
Image Source : ryangiggsblog.info
This area should get enough sunlight and therefore should be located on south or east side of the house. However, ensure that the place is shady so that the greenhouse is protected from too much heat. Also, it should have good drainage with easy access to water, electricity, and heat. Start off by leveling the ground at the plot.
2. How to plan for the best ventilation in the greenhouse?
The heating, cooling and air flow system should be adequate in the greenhouse. A continuous ventilator running across the roof is very important for letting out the hot air. Cool air should be able to pass through the greenhouse from the sides and the ends. So, make sure that there are enough vents at the base. A screen should shield all the venting outlets. Be sure to emit out heat regularly from the greenhouse whenever necessary, if you living in warmer climate regions.
Quick tips:
Despite incorporating a natural ventilation system, you will need extra gear to condition climate inside the greenhouse. A thermostat controlled ventilation system with a fan should be installed. If you live in cooler conditions, then set up heaters inside. An automatic watering system would be excellent if your budget allows.
Things to watch out for:
1. Do not build greenhouse on an area with soggy soil as it does not drain well.
2. Make sure that there is not even a single hole in the greenhouse structure; this will affect the temperature you want to maintain inside for growth of the plants.
3. If you are using a wooden base, then ensure that you have picked sawn timber or some other type of wood that will not rot.
10 Other Ingenious DIY greenhouse designs

Here are some more mind-bending and affordable greenhouse design concepts which you can implement yourself for your own little ‘green’ greenhouse.
1. DIY portable automated greenhouse
Brian Merritt offers this completely portable greenhouse with a seed starter, which includes some high-tech wizardry. Normal greenhouse risk becoming too hot if kept closed and too cold if open, but Meritt has come up with a plan to regulate the interior temperature of the greenhouse with built-in sensors. Selecting a temperature between 60 and 95 degrees Fahrenheit, by 5 degree increments, automatically helps the microcontroller adjust the vent opening to help maintain that temperature. Just four AA batteries are all you need to run these sensors and microcontroller all day for a month. The gadgets also come with a daylight sensor, high-intensity LEDs which help in night inspections and a low-battery warning indicator.
2. Homemade Greenhouse
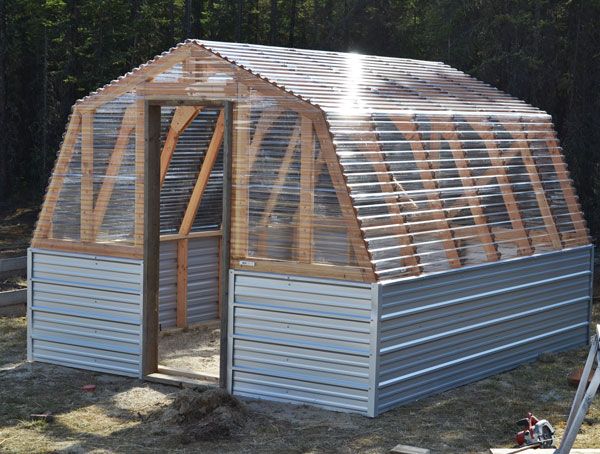
Image Source : cdn.morningchores.com
Built with a frame of pressure treated 4 x 4s, this movable greenhouse has a 12/12 roof for the snow to easily slide off and the walls are about five foot to make enough headroom in the center. Thirty six plywood gussets, studs and rafters, were nailed together and then wrapped over with 6 mil of greenhouse film. Then the house was sealed with pieces of foam.
3. Hoop house greenhouse
The main structure of this hoop greenhouse is made of 20 ft pvc pipes. With a width of 11 feet and 15 feet long and around seven and a half feet tall in the center, this ambitious hoop house started off with a budget. You could make one of these as long or as short as you want, but using this design the width needs to be around 12 feet. This seems perfect for a backyard garden space.
This greenhouse built with a budget. It was built by starting with the end walls first. Instead of getting greedy and making it wider to be more amenable in snowfall or rain, the house wasn’t built completely flat. The wood was recycled from concrete lumber and the plastic roof (non-UV 6 mil clear plastic, which saves money) and sides were folded over the ends and stapled to the wooden parts.
4. Plastic bottle greenhouse
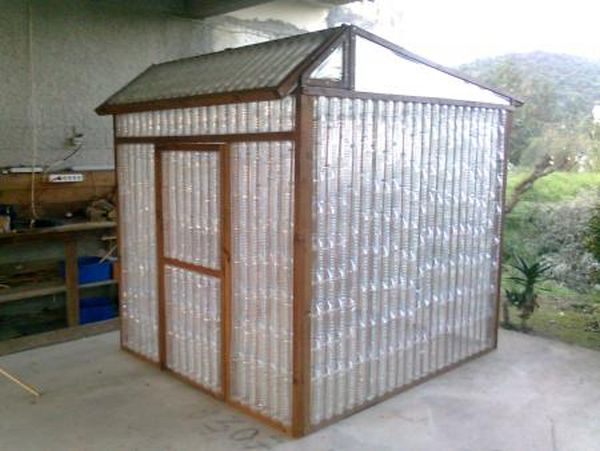
Image Source : lifelab.org
Built by a sustainable development charity named REAP, this greenhouse was built using 1,500 discarded plastic bottles and other scrap. This greenhouse is well equipped for organic farming. The frame uses four vertical posts on which the bottles are stacked up with garden cane as frame.
5. DIY haunted greenhouse
Built with the background of various legends regarding greenhouse, using unwanted glass plate negatives, which gave the interior filled with plants an abundant array of haunting shadows, this is as much an exercise in art as it is a utility. Michael Oatman, a collage artist with a class of architecture students at Rensselaer Polytechnic, was inspired enough with these stories to go ahead and build something similar. The 2,500 glass negatives are mug shots of over 15,000 criminals from the 20th century. While the work has been titled conservatory, it’s still not sure whether it’ll be ready yet for public viewing.
6. Storm Door Greenhouse
 Just like recycled windows, you can also make a greenhouse with salvaged storm doors. If you are in need of a simple and faster alternative, nothing can be better for you than this DIY greenhouse project. The biggest advantage of planning a storm door greenhouse is that the material is available almost everywhere. Besides, they can be cut into pieces very easily due to their size and can stand intact even in extreme weather condition.
7. Window Greenhouse
Older windows that are being replaced by the newer ones due to renovation of a house can be one of the best materials for your greenhouse. The best thing about a window greenhouse is that it is environmentally-friendly, economical and visually appealing. You can look for antique windows at online stores or your local antique shops and give your house an old-fashioned look. Just spend two to three hundred dollars for lumber, bolts, clasps, etc. and build your own (6”X10”) window greenhouse.
8. Plastic Bottle Greenhouse
 You have to collect as much plastic soda bottles (weighing 2 liters) as possible to build this unique and amazingly creative greenhouse. Once you are done with your collection, take a few supportive materials like wooden rods and fasten the plastic bottles with them with the help of strings or strong wires. This is one of the simplest DIY greenhouse projects and you can execute it without spending a penny as long as you have knowledge of building wooden frame.
9. $50 Hoop House
This type of greenhouse is made of Polyvinyl Chloride or PVC. Well, PVC is not at all the most excellent environmentally-friendly material for constructing greenhouse, but you can definitely build a long-lasting as well as re-usable hoop house with this. If you wish, you can also replace the PVC with bamboo or copper tubes. However, this DIY greenhouse project is very cost-effective and you need to spend only $50 for this.
10. Movable Seed Starting Greenhouse
 A portable greenhouse is something that can help people to provide enough protection to any seed that they have already sown. We can never predict weather and hence, it can really be tough to take care of our seeds at times. With the help of this small cold frame, you can save your seeds and accelerate their germination even when the weather is not that favorable.
Summary:
When it comes to making your own greenhouse, you can have a number of DIY project ideas. Get to know about 5 of them like windows greenhouse, storm doors greenhouse, $50 hoop house, plastic bottle greenhouse, etc. from this article.