Sheets of drywall also known as gypsum board are used for constructing walls and ceilings in construction these days. A substance similar to plaster, drywall is used in construction process in a unique manner. It is sealed between two sheets of heavy duty papers with drywall screws used to secure the same to wall and ceiling. Pay attention to the steps listed below and your home will have an exquisite look.

Points one need to consider
1. You will need to ensure that wall drywall is screwed to all the studs, every six to eight inches. The drywall is to be supported at every edge. The screws need to be properly countersunk. Essentially, a counter sinker designed for drywall application should be used. The counter sinker attaches itself to end of the drill and helps countersink every screw that has been used.
2. Drywall nails should not be used unless one is professionally qualified to use the same. Chances are bright that if the task is undertaken by an amateur, the nail might bend or one might put the hammer across the drywall. Instead use drywall screws as they are far easier to work with. You will need a powerful screwdriver though.
3. Ensure that drywall board meets at chamfered edges and should not be more than 1/8 to 1/4 inches away.
4. While cutting the drywall sheet, in case the pieces of board do not meet at an edge, a utility knife can be used to smoothen the rough edges. In case, you decide against using a utility knife, you will have to ensure that the seam is adjusted in a manner that it accommodates the difference in the thickening. For doing the same, you will need to place the mud on chamfered side.
5. You need to buy ready mixed mud. This will make your work much easier. Do not dilute the mud mixture. Several grades and brands of mud are available in the market. You will need to buy the all purpose mud for the first coat. Light mud is required for the final coat. Another alternate to the regular mud is the topping or brown mud. The brown mud dries faster and gives a pale appearance as compared to the regular mud. The brown mud bubbles less and dries smoother than the regular mud.
6. The mud needs to be stirred lightly but much stirring is not required. In case you stir the ready made mud vigorously, air bubbles enter the mixture and result in an uneven finish.
7. Knives used in the process need to be chosen carefully. In case plastic knives are used, the edges can get burrs over a period of time. Similarly, the metal knives can rust with continued usage unless they are dried properly after use. Pay attention to the front and back edge of the knife. In case you notice any streaks in the mud, it means that dried mud is present on the edge of the knife.
8. The mud should be placed on the knife using a trowel.
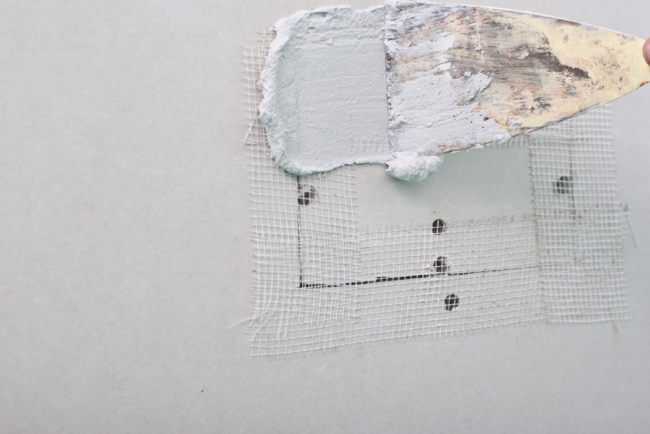
9. The mud needs to be pressed into the seam between drywall boards. The mud is to pressed hard only until the seam sets in. As you set the mud in the seam, ensure that you leave enough of mud on the wall. Ensure that a minimal of three inches of mud is left on each side.
10. The paper drywall tape is to be cut to correct length. Ensure that some extra length of drywall tape is left on each side, in case something goes wrong.
11. It is generally advised that tape need not be soaked in water. Soaking in water may make the tape a bit easier to work with but it can create problems when the tape is used for mudding. The tape also needs to be mudded into the freshly laid wall with bare hands, if possible.
12. The center of tape should be even. The seam should also be between drywall boards.
13. The mud needs to be pressed as hard as possible. In case after pushing the mud, the tape buckles under pressure, the tape needs to be flattened. As the process of covering mud by tape is over, a wider knife is needed to remove extra edges of the mud. Ensure that larger hump over the seam is not present as it will be required to be removed at a later stage.
14. Leave it for drying overnight. Corner seams might require special attention and a knife bent at 45º should be used for corners. For mending the outside corners, the use of metal corner strip is required.
The second coat is required to rub all bumps and rough edges. As you get over the work, you will need to seal the room and wear proper clothing as vacuum drying is done for giving final touches to the work done.


