Although there are plenty and more waterproofing techniques out there, they might not be that inexpensive as you want them to be. However, there are two ways you can make it fit any rainproofing budget. First, by making a choice of some unconventional material that’s both effective and affordable. Second, by learning how to waterproof your roof and then doing it yourself. Using either DIY tar or tar paper ideas are perfect if you are looking to rainproof your house. Here’s what you might want to know about both the techniques.
A DIY guide to tar paper your roof
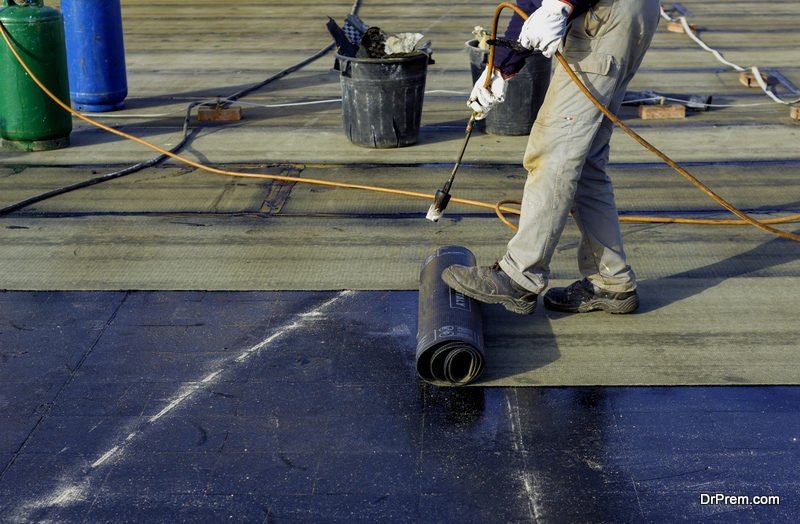
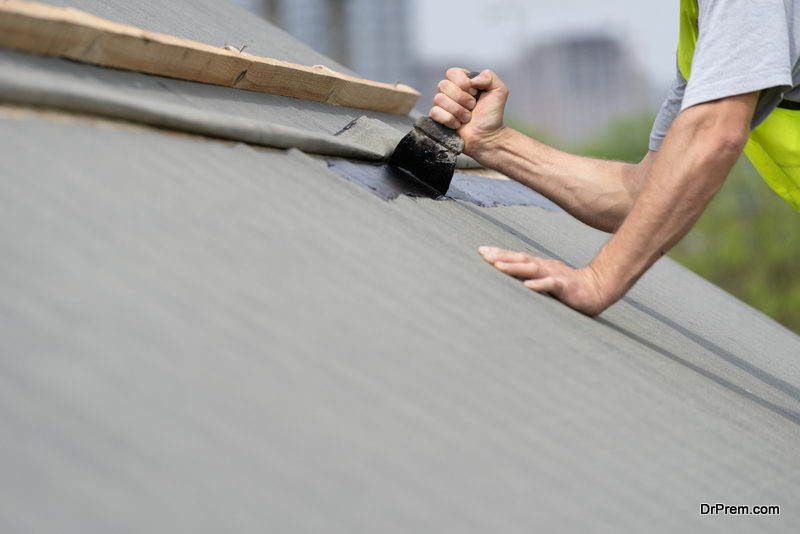 Tar paper is made from paper pulp or cardboard impregnated by tar. It is widely used globally as an excellent waterproofing agent for rooftops. More popularly known as roofing felt paper, it is usually applied on a roof before shingling it. This prevents seepage or leakage of rainwater into your house through the cracks and pits the roof. It is very easy to apply and can be easily done by the following steps.
Difficulty level: moderate
Resources required: Tar paper roll, utility knife, staple gun, nails (3/4 inch), tacking hammer, measuring tape and a ladder
Time required: The time required for this project actually depends on the roof top area of your house. Generally a 1000 square feet area requires about an hour.
Price involved: A roll of 15 lb tar paper costs about $15 to $20. This again depends on the size of your roof top.
Instructions:
1. Measurement:
First of all you have to measure the area of your roof to be covered up. Do it using the measuring tape. Now multiply the length to the breadth to get the total area. Add 15 to 20 percent to this amount to get the total area of tar paper required. This extra amount will be necessary as it will compensate the cuts and trims of the paper near the edges.
2. Laying the rolls:
Clean the roof surface and make sure it is free from stones, pebbles, hardened irregular concrete layer or anything that may cause the paper to get wriggled. Once you have the rolls, go to the edge of your roof and match the edge of the paper to that of the roof. Then start unrolling the same across the length of the roof surface till you reach the opposite edge. Flatten out any folds or bubbles with your hand as you lay the paper on the surface. Cut the extra length with the help of the utility knife as you reach the edge. If the roll was not enough long to cover the entire length, overlap the next roll with the previous one by 4 inches and continue with the same procedure.
3. Watch out:
Make sure to staple the tar paper every 5-10 inches to ensure that there is no wriggling, folding or bubbling of any sort as these may cause water to creep in. Repeat the above step to lay the next rolls side by side by overlapping about 4-6 inches with the existing ones.
4. Final Touch:
Once you have the last roll to be laid, don’t cut it if the remaining naked portion is narrower than the width of the paper. Instead, overlap the major part of the paper and adjust it likewise to cover the rest portion without wasting the tar paper.
Finally, start nailing the paper to the roof with the tacking hammer. You can apply 3-4 nails per square foot of the roof to ensure that there is no bubbling or wriggling in the future (as tar paper may bubble out due to the heat of the sun). Make sure that you apply the nails at the middle of the overlaps that you have made while laying two adjacent rolls.
Quick Tips:
Do not tear off any extra tar paper. Always use the utility knife to cut out the extra pieces. You can also use a pair of big scissors for this purpose. This will help you retain the looks and finishing of the tar cover by ensuring clean cuts.
Make sure not to fold the tar paper while carrying it from the markets. Folds and crimps cause the paper to get torn very easily.
For houses situated in heavy-raining regions, it is advisable to use thicker tar papers (30 lb) rather than thinner ones (15 lb) for better water-proofing.
Possible risks involved:
 Always use a ladder while working at the roof edges instead of working from above. This will reduce the risk of falling off the roof. Make sure to sound an alarm before throwing off any tools or equipment from above the roof to avoid an accident.
Never use bigger nails for fastening the tar paper. Digging big nails on your ceiling can generate cracks causing seepage of water into your interiors. Thus always make use of small nails.
The environmental aspect:
Tar paper is made up of recycled organic products like cardboard or recycled paper and tar. Thus the product is completely green and eco-friendly. It has no adverse effect on the environment and hence is safe to use on your rooftops.
Tar paper is an easy and green solution for waterproofing rooftops. The above steps followed carefully will make your roof safe and seepage free for a long time.
No paper? No problem! You can even waterproof your roof using just tar
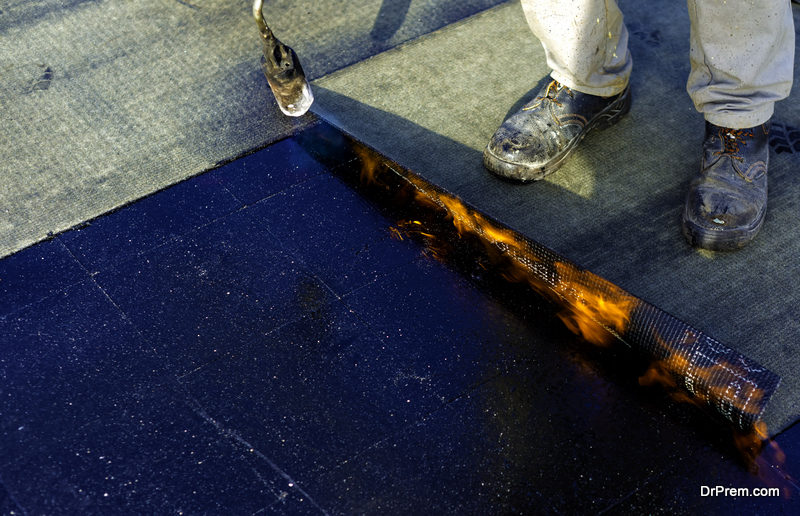
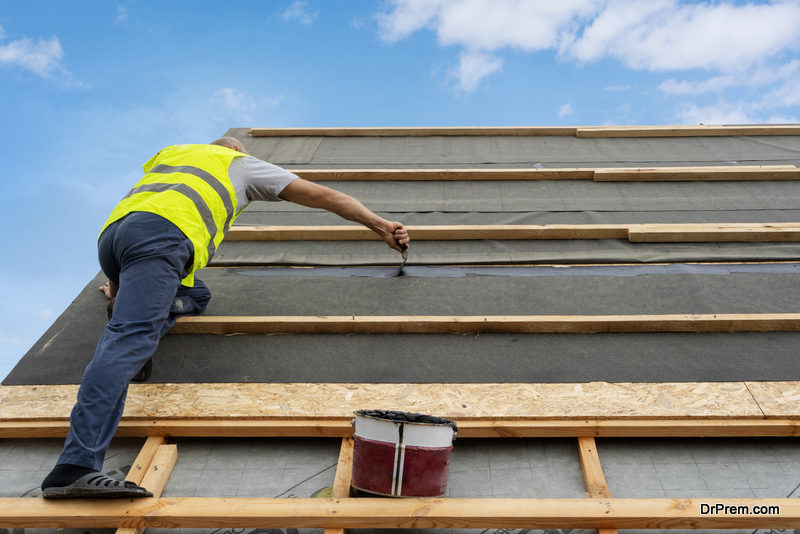
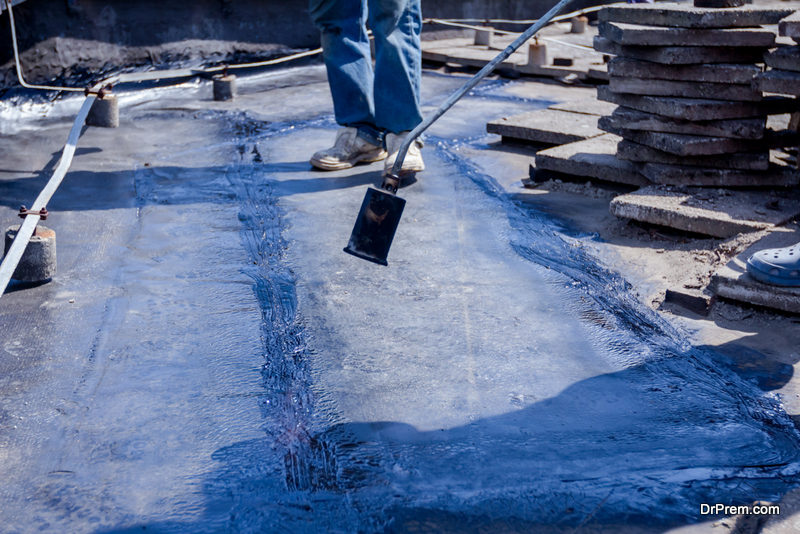
Tar acts a physical barrier to the external corroding agents such as the rainwater, ice, etc. There are several processes to apply tar on your rooftop. Make sure you get your rooftop measured properly so that you can get to know the exact amount of tar to be purchased. Though the expertise needed for this job is minimum, still it is pretty tough and sweaty. In the following steps, it has been described how to apply molten tar on your rooftop to make it waterproof and seepage free.
Difficulty level. Moderate (may require expertise in a few areas).
Time required. The time required for this project depends on the area needed to be coated with tar. Generally, it takes about one hour to coat 1000 square feet of area.
Resources required:
- A measurement tape
- A barrel of roofing tar
- A trowel or any flat tool to flatten up the molten tar
- A hand roller
- A ladder (long enough to reach up to your roof edge)
Estimated cost. The cost involved again depends upon the size of the area needed to be tarred. However, a barrel which can coat up to 2000 square feet area will cost about $6.
Instructions
- First of all go for measurements. This will give you an estimate of how much tar you need to purchase. Generally, it requires 5-6 gallons of tar to coat an area of 100 square feet. Make sure to buy a bit excess than actually required.
- It is very important to know the exact time for applying tar coating on your roof. Select a time during which you would never expect any heavy precipitation (rain or ice).
- Next comes the ideal temperature range for applying roofing tar. The best temperature range is about 40-45º F. Though the settling temperature for tar is at least 65-70º F. Too much high temperature is inappropriate as it will cause the tar to drip.
- Once you have all the tools at your hand, fix up the ladder at any corner of your roof. Once you get up, reach the opposite corner from the one you came up. Carry the barrel of tar along with the trowel and hand roller to the corner and start applying it evenly throughout the surface using the trowel. Wait for a couple of minutes for the molten tar to settle down a bit.
- Next, use the hand roller to smooth up the tar layer on your roof surface.
- Move backwards as you cover up the further end. In this way, you will always have an escape way out of your roof without disturbing the freshly coated surface.
- If you want to do major repairs, then make sure that the tar reaches to about 4-6 inches in the dents or cracks in your roof.
- Concentrate on the corners and edges as the concrete in these areas are weak and easily weathered away causing water leakage and seepage.
Quick tips
- Make sure you ask a number of questions at the house utility shop before buying the appropriate tar that you need.
- You can use tar paper instead of molten tar to cover up your rooftop. This would save your time and labor.
- Make sure you wear an old dress while doing this job. This is because roofing tar stains almost everything on the slightest touch.
- You can also use a straw broom or a sponged floor cleaner to apply the tar, if you cannot find a trowel.
- Make sure the roof surface is clean and almost free from dust or moisture before starting the job.
- Clean up the drainage ways from your roof. If you apply tar on a pre-blocked drain or pipeline, it may permanently seal that vent.
Possible risks involved
- Tar is very sticky and bear a pungent odor. Make sure it does not come in contact with any open or naked injury as it may cause irritation or infection.
- Always be cautious while working on rooftops. Always keep a careful watch around and watch your step so that you do not tumble off your roof.
Environmental aspect
 Nowadays, Eco-friendly tars are available in the market. Though they are a bit expensive, still it is suggested that you use them to minimize your carbon footprint. Some tars need to be preheated before applying them. This preheating generates black fumes which pollute your surroundings. Thus it is better to buy premolten packaged tar to avoid the previous problem.
Though this project can be easily done by a novice, still it demands hard work and patience to complete it. But once you complete it, you can certainly be relieved of the tension of water seepage from your ceiling.