Those, familiar with the art of gifting, will know that nothing wins the heart of a person more than gifting something that you have made on your own. That shows love and commitment and adds that personal touch which makes the gift very special. It is not that one needs to have special skills to make gifts. Good ideas coupled with time, energy and patience will yield amazing results. Here are five DIY projects that lend themselves well to making gifts.
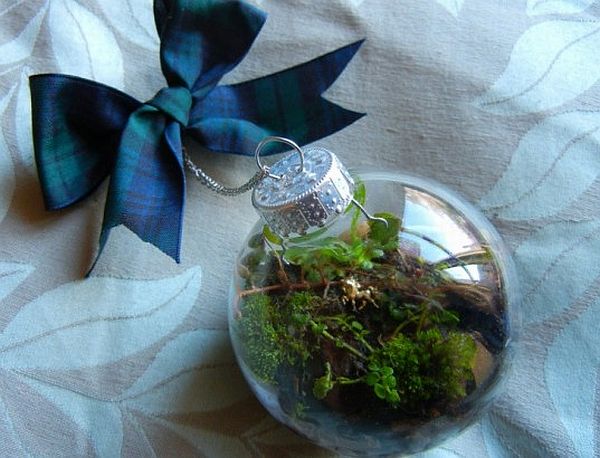
1. Terrarium Christmas Ornament

This would indeed be a nice and green gift to present at the beginning of a New Year! All you need is a nice reusable glass orb. Clean the orb thoroughly so that it is completely transparent and it does not have any obstructions. Choose the different plants and moss that you would like to plant in your orb. Carefully pour the soil into the orb and place the necessary nutrients into it. Be careful while handling the orb else it may break. Once that is done, make use of a pair of tweezers to gently plant the little greens into the soil. Leave sufficient space between the plants so that they can grow well. Also keep them moist by sprinkling water. The job is one that requires a lot of patience but the end result is very rewarding. Add ribbons, tiny toys and other decorative material of your choice to enhance the looks of the orb. As a final step, close the lid and attach a bow for extra decoration. Your gift is ready.
2. Cavalier Pot

This simple Cavalier pot would be something that your friends with balconies and railings would love. And you can prepare the gift for them all by yourself. This award-winning design for the pot makes it look elegant and functionally useful. The pot is constructed in two halves with an arched gap in the bottom portion. The two chambers connect at the top of the pot. This pot can thus sit easily and neatly on the railing in the balcony. Put in the right soil and add the plants of your choice to have your gift ready for the New Year!
3. Recycled Teacup Soy candle

This is another simple DIY project that you could undertake. Perfumed and scented candles are traditional gifts. And you could make such a candle on your own. All it needs is a good container or cup that is both decorative and temperature resistant. Just melt down a pound of Soy wax till it becomes a clear liquid. Even as it is heating, add the necessary way coloring to obtain colored candles. Finally, add the candle fragrance of your choice into the wax. Pour the wax into the cups. Goodwill Teacups will serve you best. When the wax is still hot, put the wick in the center and hold it in place with double sided tape or any other means. Allow the wax to cool and you have your own cool Soy candle!
4. Tote Bag

If you have some good fabric and an hour to spare, you could design your own tote bag to give away as a gift. Apart from the sewing machine and the sewing tools, you would require a couple of large eyelets and four small rivets. Make use of a pattern template to cut the fabric pieces. We shall make each half separately. Locate the center, fold and stitch the sides’ edges of the bag. Create triangular corners at the sides and stitch them up. Finally, stitch the corners and repeat the same with the other fabric piece also. Stitch together each of the halves and add the eyelets and rivets. The possibilities for customization are many. The result will be elegant. Make use of complimentary colors in the fabrics for best looks.
5. Brenna’s pinhole artwork

This is a very easy and elegant gift. All you need is a good picture whose artwork you want to produce, some cotton paper and tacks. Clip the cotton paper along with the picture such that the picture comes on top. (If the picture is not to be damages, then copy it and make use of the copy.) Pin these two to a piece of similarly sized cardboard. Trace the various lines of the picture with the help of the tack. Make holes as you go along. Poke till the tack touches the cardboard. Once you are done, take out the picture and add more holes by freehand to enhance the art piece. Cut the cotton paper to the desired proportions and frame it for a lovely gift.