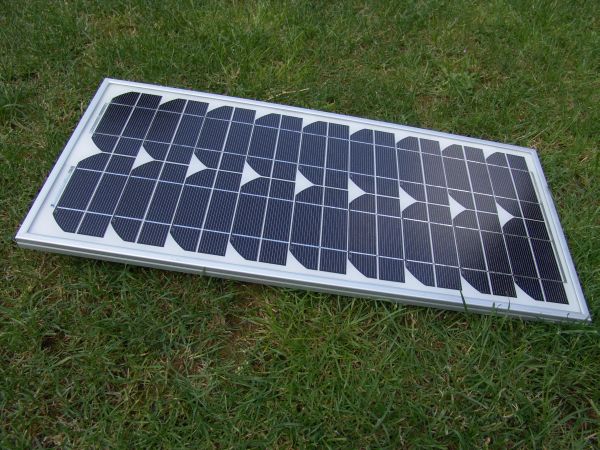

Solar cells are a great idea to turn your lifestyle green and more economical. But a solar cell by itself is not powerful enough – a whole solar panel is necessary. Before going into that, let’s see how solar cells function.
A solar cell generates electricity from the electrons released from its photon-bombarded material. It consists of an N-semiconductor (silicon with phosphorus, having extra electrons) and a P-semiconductor (silicon with boron, having an absence of electrons). The magnetic field between these two prevents released electrons from photons-bombarded N-semiconductor traveling to the P side. Current and voltage are observed when a load is connected.
Time required
It takes about 12 hours to make a single 100 W solar panel. Most of that time is spent on the wiring and soldering.
Requirements
Panel:
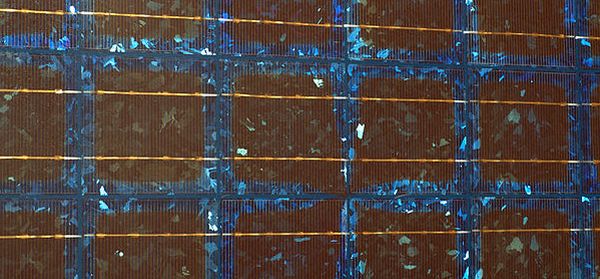
1. 36 mono-crystalline 6” solar cell (.5VDC, 6A Peak)
2. Crimping tool
3. 40 watt soldering iron
4. Tinned wire
5. Barrier strip with dual row of 4 position
6. Ribbon for interconnection of the PV tinned solar cell
7. 8 ounce Rosin core solder
8. A transparent acrylite UV stabilizing sheet (48 x 1/9 inch)
9. ABS white sheet of 48 x 48 x 3/16”
10. 72 x 1/4 x ¼” clear extruded acrylic bar
11. Adhesive glue
12. 16 #8 ring tongue terminals which is insulated
13. Black insulator hookup wire of 12 gauge
14. Red insulator hookup wire 12 gauge
Enclosure box:
1. Project enclosure box of 3 x 2 x 1”
2. Schottky barrier diode (5A)
3. Silicon sealant/adhesive
Optional:
1. Multimeter
2. Variable temperature heat gun
3. Surlyn sheet (i.e. UV resistant) or 28 x 28 feet with.018” thick EVA sheet.
Method
1. Measure the DC voltage of your solar cells with a multimeter and segregate them into groupings of .05 volt increments for maximum output.
2. Connect the solar cells by soldering them on to tinned interconnection wire. Add solder on to half the length of three 10.5” wires from left side. Solder these to the connecting strip of the solar cell. Now turn the wire and add solder to the rest of it. Solder this to another solar cell’s connecting strip (leaving 1/16” between the two cells).
3. 36 such cells are arranged in series in a zigzag way so as to use minimum wire.
4. To prevent premature degradation of cells because of oxygen, sandwich the solar cells between two EVA sheets by heat gunning.
5. Place the soldered cells face upon an ABS sheet. Drill a 5/16” hole in the sheet 6” from the right-top edge and 1” below the right-top edge.
6. Solder 3”of the wire, i.e. color- coded to the exact negative and positive interconnection wire of the first and 36th cells. The other end of the wires is pushed through the 5/16” drilled hole.
7. Frame the cells with 72 x 1/4 x ¼” clear extruded acrylic bars (cut to a length of 38.3125”) using glue.
8. Cut the extra acrylic bar which is clearly extruded with the dimensions; 1 x 1/4 x ¼” long blocks and glue them between every square of four cells in an alternate manner.
9. Place glue on each acrylic bar piece and firmly attach an acrylite UV stabilized transparent sheet on them.
10. Drill one 5/16” hole each in the bottom and side of the project enclosure box as 3 x 2 x 1”. Push the wire extending from the solar panels back through the bottom hole. Glue the enclosure box to the back of the solar panel.
11. Assemble the junction block with wire and the diode.
12. Seal the two holes with silicon sealant/adhesive.
FAQs
1. Why do we need the charge controller/rectifier?
Ans. When you connect your solar panel directly to a battery, reverse current from the battery can damage the solar cells. The charge controller/rectifier prevents this.
2. Which kind of solar cells are best suited for this project?
Ans. The recommended ones are the class B blemished 6” diameter Shell PowerMax mono-crystalline solar cells. Class A cells give better performance, but they are pretty expensive.
Quick tips
1. Predefine your objective for building a solar panel. Decide how much power and output you will need.
2. Avoid using solar cell fragments as they have high resistance and low output.
3. Before gun heating EVA sheet, place the cells on top of white paper and then solder them together. This is because EVA is very adhesive after heating and one could damage the solar cells while peeling off the EVA sheet from the cardboard.
4. Over-cut the EVA sheet as it shrinks after heating.